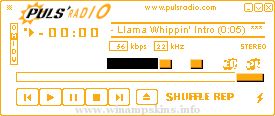
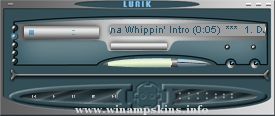
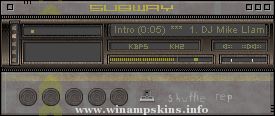
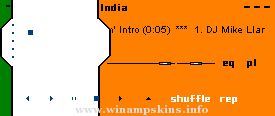
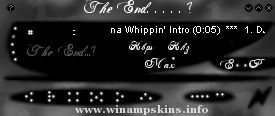
; I stole this from the Complex skin, cause hey I thought it was cool :)
; (and cause I'm too lazy to document it myself. :)
; The original author is Adam Kennedy
;
; Hope you don't mind Adam :)
;
;
; -Justin
;
;
; P.S. you can use the section names [WindowShade] and [Equalizer]
; for obvious purposes =)
;
;
; REGION.TXT STRUCTURE FOR DEFINING SKIN MASKS
;
;The region information comes without any supporting documentation
;so I thought I might as well make some.
;
;The region.txt in WinAmp 1.92 allows us to some interesting things with transparencies
;But how does it work?
;
;Well, basically, it lets you define a set of polygons. Anything inside a polygon is drawn. Anything not in a polygon is not drawn. Simple heh?
;For how to define it have a look below at the first block. Un-comment it now. Don't worry about commenting the actual one lower down, if WinAmp finds multiple definitions, it only does the first and ignores the rest
;
;How to make a mask
;1. Type [Normal]. Real simple that one. (My guess is it is just for forward compatibility)
;2. Just type the NumPoints= and leave the number blank, we'll fill it in later
;3. OK, now for the fun part.
; The co-ordinates you should type in are the OUTSIDE pixel co-ordinates in x,y format.
; Start at the top lefthand corner and work your way CLOCKWISE around you polygon.
; Now WinAmp ONLY accepts the PointList as one line of comma seperated variables.
; You can use spaces, but DONT GO ONTO A NEW LINE. Clear? Good. :)
; One last thing, don't type the first position again at the end, WinAmp joins them.
; Putting a space between each pair is simply common sense, right?
;4. Once your done, count the number of co-ords, and fill in that number for NumPoints.
;
;Oh, as a side note, the x variables go from 0 to 275, and the y from 0 to 116.
;So if you look at the first example you can see I've gone across the second top line, gone down a bit, ducked in one pixel, gone down to the bottom, and across and back up the other side, putting another ledge on the other side.
;This does the outside border, and chops some bits out on the top and edges
;[Normal]
;NumPoints=8 ;Do this LAST!
;PointList=0,1, 271,0, 275,3, 276,109, 272,114, 268,118, 7,116, 2,114 1,109 0,10 5,4
;Cool heh? Very subtle effect. Now lets try a more complex one, with multiple polygons
;For your first hard(ish) mask, I suggest defining each element as a seperate mask.
;It makes them a bit easier to think about.
;First, lets define an area that JUST does the titlebar.
[Normal]
NumPoints=9
PointList=11,0, 275,1, 275,14, 0,14
;Simple as can be :)
;Go ahead, uncomment it and have a look. Just remember to recomment everything above it
;Doing your areas one at a time does speed the process up a bit
;Now lets define JUST the area sort of inside the outer ring
;[Normal]
;NumPoints = 4
;PointList = 3,15, 272,15, 272,113, 3,113
;Right, so say we want a mask that has, the titlebar AND the main area.
;We just add them together
; [Normal]
; NumPoints = 4, 4 ;Make sure to get the order right(although it doesnt matter here =P )
; PointList = 0,1, 275,1, 275,14, 0,14, 3,15, 272,15, 272,113, 3,113
;Dont forget to add that extra comma after the first set.
; Having that bigger gap that lets you "keep it in your head" easier, it's a good idea
;OK, now lets try something tricky. We are going to make a mask for just one green line around the outside of the skin
;This introduces the other "big thing" with masks. Have a look at the first three co-ordinates below. You can see the first two moves we make are to go one to the side and then go down to the bottom. Looking at the last co-ordinate you can see we will come back up at the end, making a line two wide, right?
;WRONG!! Here comes the big important phrase.
;IF YOU ARNT FOLLOWING THE OUTSIDE EDGE, YOUR CO-ORDINATES MARK TRANSPARENT SPACE LIMITS
;That's right. Because I don't make a square, because I have to turn "inside" the box, I am only marking space, and what I end up with is a mask with one green line.
;WARNING: Leave your skins dialog open when you do this one. :)
;[Normal]
;NumPoints = 8
;PointList = 1,14, 2,14, 2,114, 273,114, 273,14, 274,14, 274,115, 1,115
;OK, as the final touch lets add lets the border we just made to the other two.
;You should be able to work this out on your own
;[Normal]
;NumPoints = 4, 4, 8
;PointList = 0,1, 275,1, 275,14, 0,14, 3,15, 272,15, 272,113, 3,113, 1,14, 2,14, 2,114, 273,114, 273,14, 274,14, 274,115, 1,115
;hmm... that still looks a bit tacky down the bottom right
;So I'm going to modify it a bit
;See if you can work out what I've had to alter just by looking at the display of it
;[Normal]
;NumPoints = 4, 4, 8
;PointList = 0,1, 275,1, 275,14, 0,14, 3,15, 272,15, 272,80, 3,80, 1,14, 2,14, 2,81, 273,81, 273,14, 274,14, 274,115, 1,115
; Justin's whacked trans skin :) in one, big lame messy line
; [Normal]
; NumPoints=20,4,4,4,8,4,4,6,6,4,4,4,4
; PointList=0,0,19,0,19,11,114,11,114,0,156,0,156,11,243,11,243,0,275,0,275,13,266,13,266,22,264,22,264,13,111,13,111,22,109,22,109,13,0,13, 109,22,266,22,266,36,109,36, 16,88,130,88,130,105,16,105, 136,89,157,89,157,104,136,104, 22,13,22,62,102,62,102,13,100,13,100,24,24,24,24,13, 0,0,275,0,275,3,0,3, 16,72,264,72,264,81,16,81, 0,13,0,78,16,78,16,75,4,75,4,13, 275,13,275,78,264,78,264,75,272,75,272,13, 14,78,16,78,16,105,14,105, 130,81,132,81,132,105,130,105, 146,81,146,89,148,89,148,81, 130,96,136,96,136,98,130,98
;THE END
;
;Post-Script
;The other good thing about doing your mask in bits and pieces like this is that can make multiple versions so you can change as your whims change
==========
difernet AMP - Official difernet ART Winamp Skin
==========
For Winamp 2x
Skin by Kali Romiglia
Time: From May 21 to May 23, 01 (3 Days)
Distributed at:
www.difernet.com
www.romiglia.com
www.winamp.com
==========
Contact Details
==========
kali:info-is@in-file www.romiglia.com
difernet: www.difernet.com
Narcoamp was created by Tudor Watson for Narcopop.com
Get the latest info on mp3 and links to hundreds of free tracks at http://www.narcopop.com
Winamp can be downloaded from http://www.winamp.com,
Share and Enjoy ...
Original Gfx copyright Tudor ...
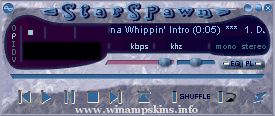
This is the official Winampskin of the House-Trained Wavecoremetalband . If you wish to see what other goodies we have for you at our site, please visit it at www.starspawn.com. (you'll find our lyrics, funstuff, mp3 downloads, pix,...). We hope to welcom ...
Title: Éowyn - Lady of Rohan
*****************************************************
Here I go again!^_^
After making some HP skins I finally returned to Lord of the Rings.
I've done an Éomer skin and now I thought it would be the right time to honour h ...
"Fire & Steel" v1.0 WinAmp skin
Author: Schott in the Head
Complete with MN, PL, EQ & MB skins
Currently there is no AVI skin.
Look for it when v2.0 is released
If you like clean & simple this is the skin for you.
With all the ...
She in da skin
(c) Igor "jokla" Klajo 2003
info-is@in-file
http://jokla.deviantart.com
This is my first WinAmp 2.9x skin I've ever finished, but not the first I started to work on, it's the third. One I didn't finished beacause of a reason I'm not ...